
Introduction
Hey there, besties! Do you want to learn an awesome way to organize, edit, and analyze different types of information? Look no further than Google Sheets! In this article, we’ll explore the amazing possibilities that spreadsheets offer and navigate the Google Sheets interface like pros. Get ready to level up your organizational skills and become a Sheets superstar!
All about Google Sheets
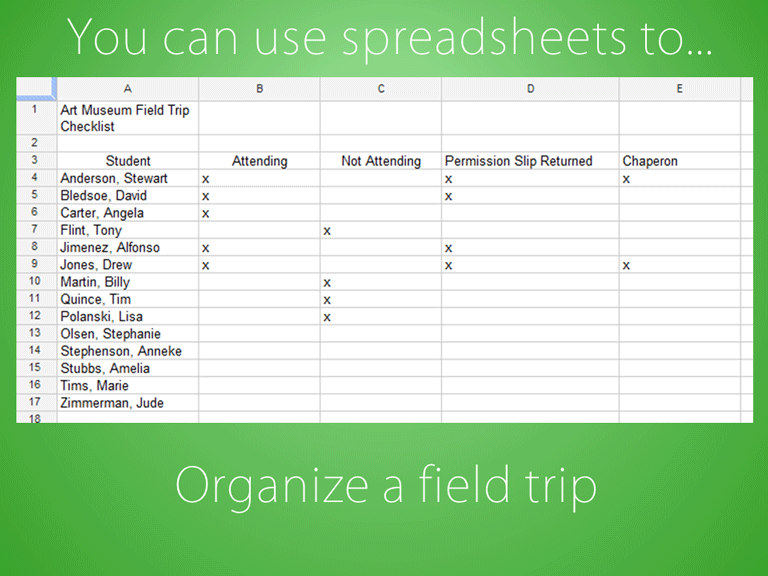
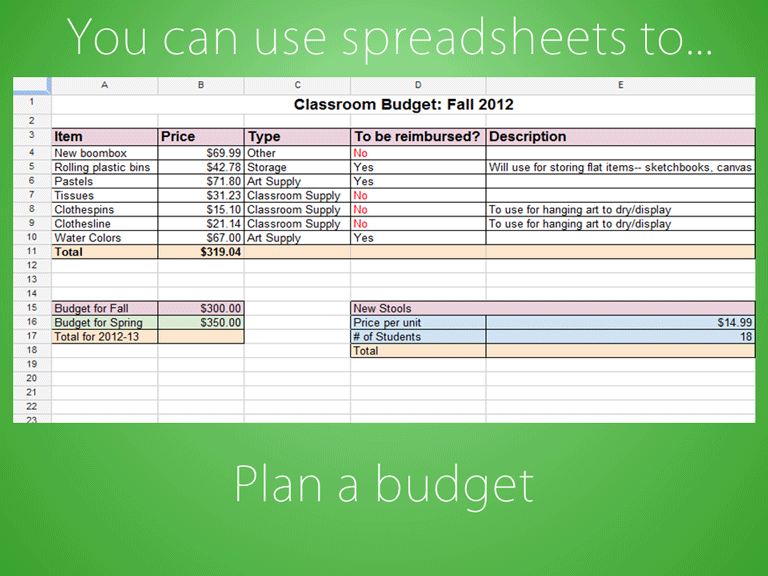
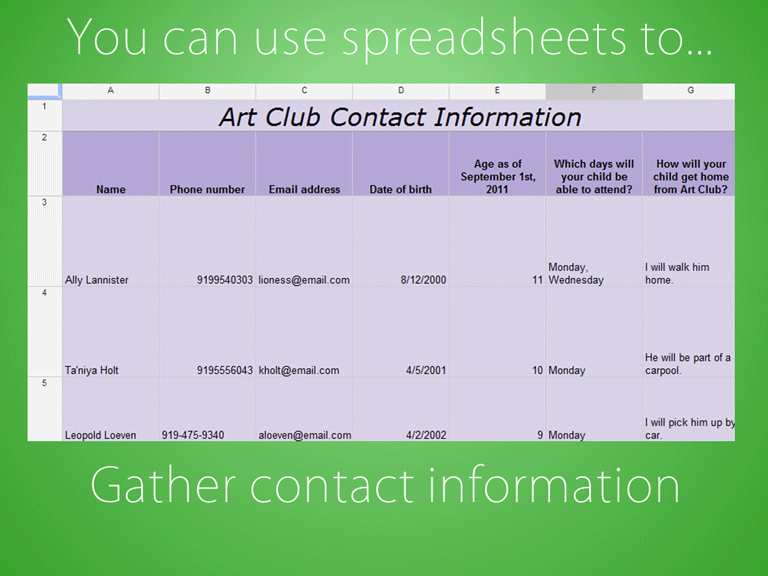
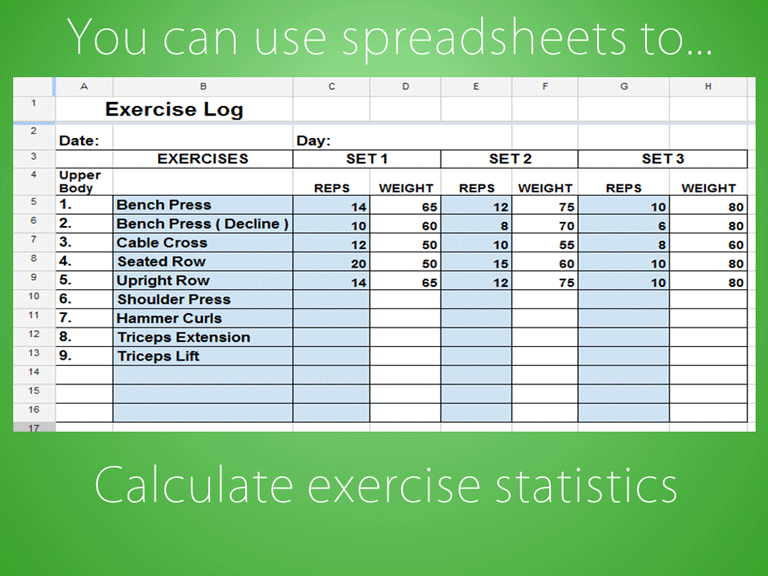
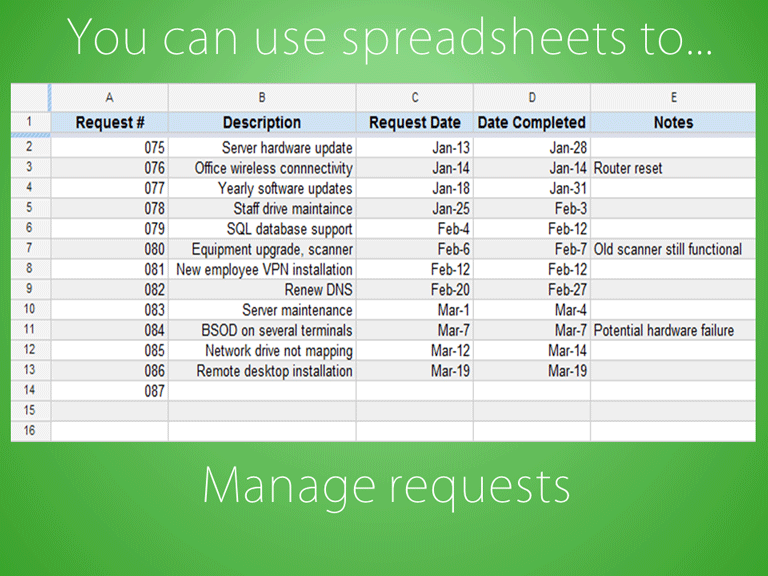
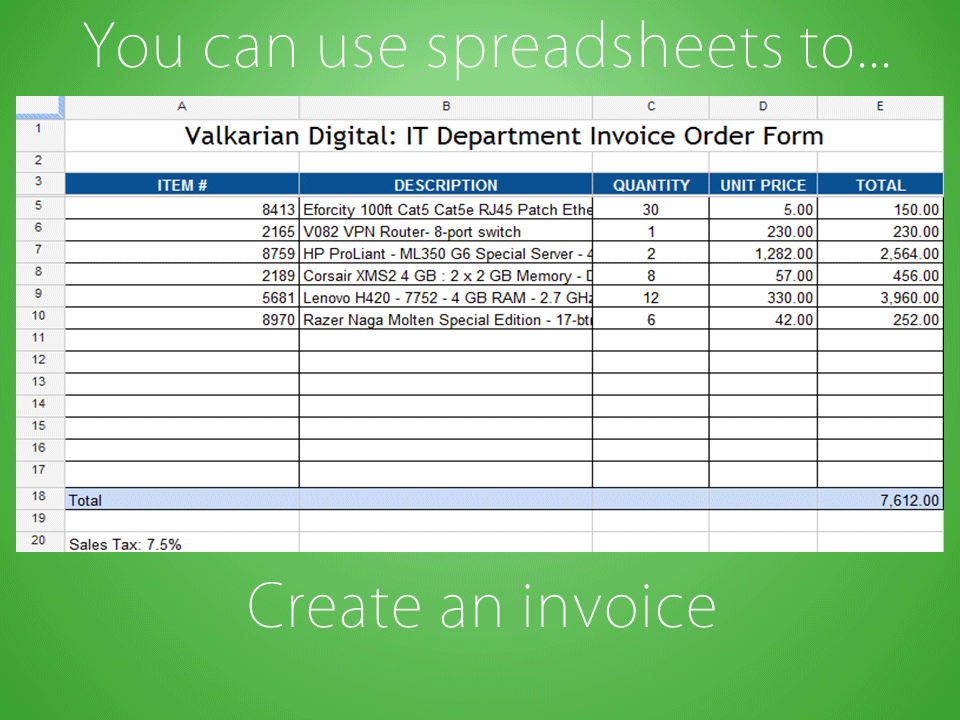
Google Sheets is a web-based spreadsheet application that lets you store and organize information just like Microsoft Excel. But here’s the best part – spreadsheets aren’t just for number-crunching experts! They can be used in various everyday tasks, from budgeting to garden planning, and even creating invoices. The possibilities are endless!

To Create a New Google Spreadsheet:
- While viewing your Google Drive, click New and select Google Sheets from the drop-down menu.
- The spreadsheet will appear in a new browser tab.
- To name your spreadsheet, locate and select Untitled spreadsheet at the top of the page. Type a name for your spreadsheet, then press Enter on your keyboard.
- Your spreadsheet will be renamed.
- Whenever you need to view or edit your spreadsheet, you can access it again from your Google Drive, where it will be saved automatically.
You might have noticed that there is no save button in Google Sheets. That’s because Google Drive uses autosave, which means your changes are automatically saved as you edit. No more worrying about losing your work!
The Google Sheets Interface
To unleash your spreadsheet magic, it’s essential to become familiar with the Google Sheets interface. Let’s take a quick tour:
Cell Basics
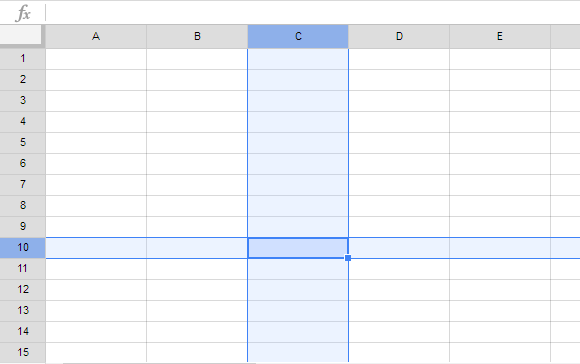
Imagine a spreadsheet as thousands of little rectangles called cells. Each cell is the intersection of a row and a column, identified by letters and numbers. For example, cell C10 is in column C and row 10. Cool, right?
You can select multiple cells, creating a cell range. Instead of referring to individual cell addresses, you’ll use the first and last cells’ addresses separated by a colon. For instance, A1:A5 represents cells A1, A2, A3, A4, and A5.
Understanding Cell Content
Every cell can contain various types of content, such as text, formatting, formulas, and functions.
- Text: Cells can store letters, numbers, and dates.
- Formatting attributes: Cells can display content in different formats, like percentages or with background colors.
- Formulas and functions: Cells can perform calculations using formulas and functions.
Selecting, Inserting, Deleting, Copying, and Pasting Cells
To perform any action in a cell, you first need to select it. Here’s a quick rundown of some cell-related actions using Google Sheets:
- Selecting cells: Click a cell or drag the mouse to select multiple cells.
- Inserting cell content: Enter the desired content into the selected cell or the formula bar.
- Deleting cell content: Select the cell and press the delete or backspace key.
- Copying and pasting cells: Copy cells with Ctrl+C (Windows) or Command+C (Mac), select the target cells, and paste with Ctrl+V (Windows) or Command+V (Mac).
- Cutting and pasting cells: Cut cells with Ctrl+X (Windows) or Command+X (Mac), select the target cells, and paste with Ctrl+V (Windows) or Command+V (Mac).
- Dragging and dropping cells: Drag cells to move their contents to a new location.
You can also use the fill handle to quickly copy content to other cells in the same row or column. And if you want to continue a series, the fill handle can automatically guess the next items in the sequence.
Challenge!
Ready for some hands-on practice? Let’s put your skills to the test:
- Open Google Sheets and create a new blank spreadsheet.
- Change the spreadsheet title from Untitled Spreadsheet to Practice Spreadsheet.
- In cell A1, type the date using the format M/D/YY (e.g., 5/30/17).
- Use the fill handle to populate dates in cells A1:A10.
- Use drag and drop to move the dates to cells B1:B10.
- Delete the content in cell B5.
- When you’re done, your spreadsheet should look something like this:

Congratulations on completing the challenge! You’re now a Google Sheets rockstar!
And that concludes our journey into the wonderful world of Google Sheets. We hope you had a blast and discovered the amazing potential of spreadsheets. Remember, Crawlan.com is your go-to place for more exciting insights and tips. Stay tuned for more juiciest secrets!


